Your Brand Personality
It's time to apply
What we’ll cover today is how to immediately apply your personality to the look and feel of your content. If you already know your colour palette and design details – you can skip to Step 3. This is a fun and helpful application to start creating your unique look and feel on social media.
Why do it? As Paul Rand said “Design is the silent ambassador for your brand.”
What you’ll find is 4 different activities:
- Choose a colour palette
- Choose a font
- Decide how your posts will look
- Create templates
Step 1. Choose a colour palette.
What is it? A ‘colour palette’ is set of colours that will represent your brand. You will use the colours throughout your social media to create a consistent look and feel. The colours you choose will convey your brand personality.
How Do You Pick Your Colours:
- Use Personality Words
Go back to the exercise you completed earlier this week. Look at the words you used to describe your personality. If you chose things like vibrant, outgoing, and fun – then you’ll choose bold and bright colours.
If it were words like calm, wise and supportive – you’ll choose calming pastel tones, like pale blues or greens. - Consider your Audience
Think about the demographics of your target market.
Are they women or men?
Young or old?
Formal or relaxed?
Corporate or classroom? - What do you like?
Think about the colours that you like.
Make sure they represent your business well.
Will it portray corporate or casual?
Will they be enduring?
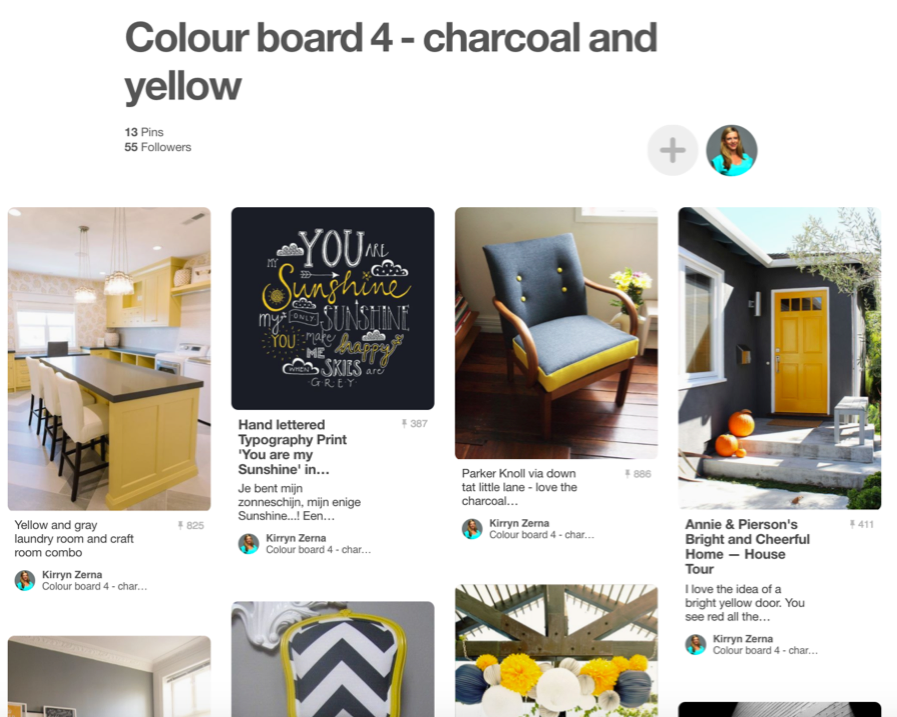
Create Pinterest Boards To Help You Decide
In Pinterest you can create mood boards to help you decide.
- First create a ‘board’ with the names of the colours you like e.g. dusky pink and blue, or metallic or dark grey and yellow.
- Then search for the images – just type in the colour in the search field and you’ll see lots of pictures coming up in those colours.
- Choose from pictures that you like and pin them to the appropriate boards. You’ll start to get a sense of what you like and more importantly, what matches the personality of your brand.
You can see my boards here:


Ask Your Friends And Colleagues
Then as a final test, share the boards and ask people you trust what they think of them. I have found this is a great way to work out your colours.
Select From Existing Colour Palettes
Another option, you can go to websites that list out a range of colour palettes and then you can pick from the colour you’ve chosen. See below links.
See.. it’s easier than you think!
Step 2. Choose your font.
Have a play at what fonts work well together. On topics like this, I like to reach to experts for advice.
Let the expert software like Canva, match together fonts in combinations suggestions and so it’s just up to you to pick what you like.
Here’s some help of what to choose from:
Step 3. Decide how your posts will look
We’ll talk about content next week in detail. For now we’ll just talk about the look of the posts that you create as images. This is especially important if you want to focus on Instagram as every post is an image.
Choose A Pattern:
Instagram is a good place to check out other people’s image style. When you look at someone’s profile page, try and notice the flow of images and you’ll often see a bit of a pattern.
- There’ll be a plain photograph
- Then a plain background with cursive writing
- Then an image with a square on it
- Then a plain photo with a logo
- Then it all repeats.
So it’s handy to create 3-4 templates that you will use on an ongoing basis. Think about what you want.
Image Themes:
What will your photographic themes be?
- are you all about people
- all about places
- very open photos with lots of white space
- very busy images with patterns and /or people
- are do say no to photos, and just illustrations?
Filters:
Will you always choose the same filter for consistency? Or choose one or two?
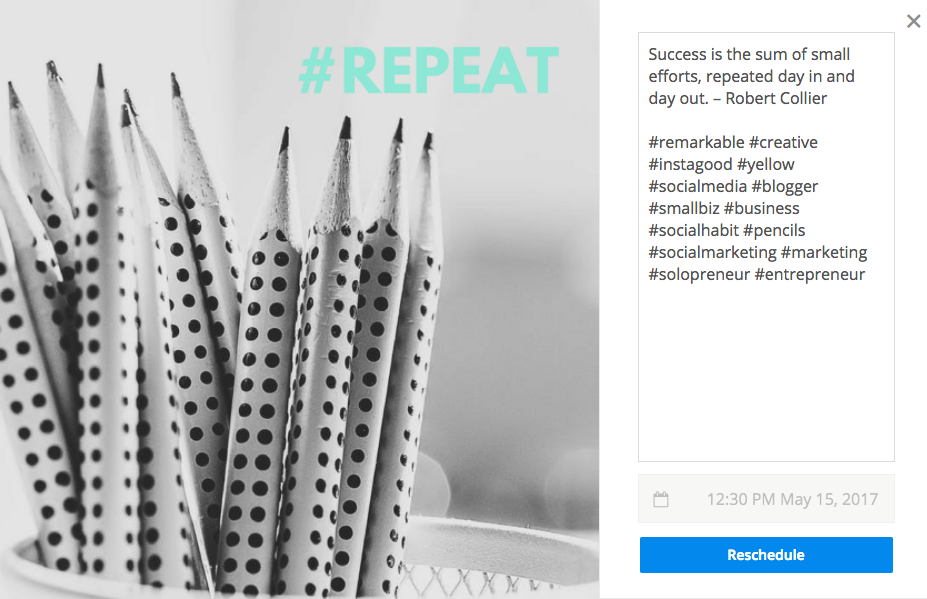
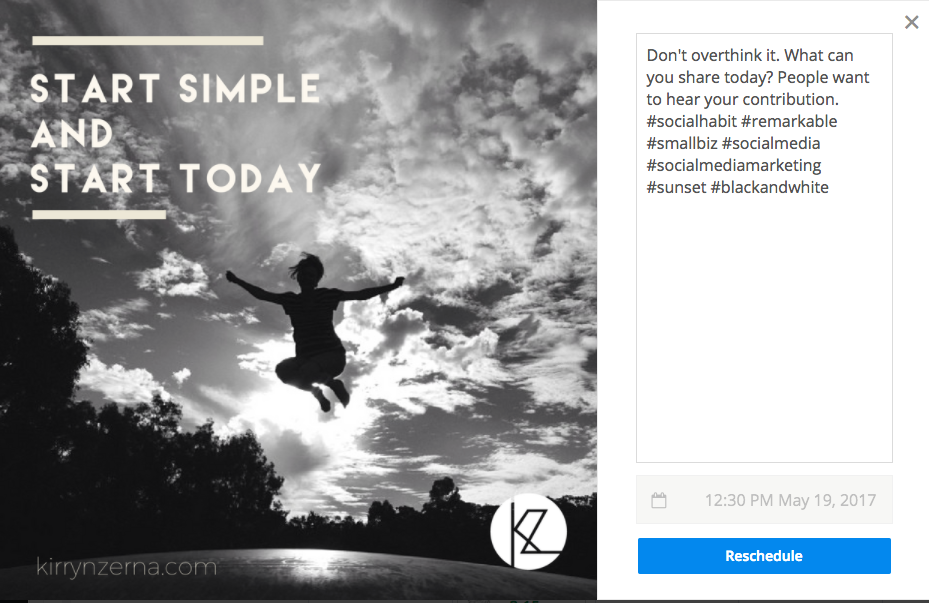
Step 4. Create image templates.
Create 1-3 templates that you can use again and again.. Your unique look and feel will make your posts more recognisable and memorable to your audience.
How To Do It
I like to use Canva, but you may be a whizz at InDesign or another app, but I’ll talk about Canva here.
Canva is a self-service tool loaded with enough easy-to-use features and functionality that anyone can create a variety of engaging content that gets shared. Canva gives you access to thousands of templates and it has a very easy drag and drop process for creating posts. It’s free and you can register straight away. There are paid memberships which allow you more access, but the free version is pretty good.
Toolbox: Check out the Toolbox if you want to know more about Canva and how to use it. You can source free images for your posts from Pexels.com
Here’s what I recommend you do:
- Create 1 or 2 templates that you will use to post quotes from your favourite person or from yourself – I put a post with one word from the quote and my logo.
- Create a announcement or sale template.
- Maybe an image template with just your logo on it
- And for any other regular content – I made a Tuesday Tips template.
Check out examples below. These were each made from a template from Canva.